Can you tell I LOVE this set?! I wanted to show a close up of how I layered the tree. Stamp the tree on Whisper White CS using Old Olive ink pad. Trimmed the tree, added dimensionals dots and adhered to Old Olive CS. Using scissors, I trimmed around the tree, leaving a border peeking out from behind the stamped tree. Again, I used the 2-Way Glue Pen and Dazzling Diamonds Glitter to add some zip to this monochromatic card. Circle punches were used to "pop' some of the elements of the set to complete the card. Hope you like it.
Wednesday, October 31, 2007
Buy Three Get One FREE
Purchase Three Packs of Designer Series Paper (DSP).....Get One Free!
No Limit!
35 Beautiful Choices!
Purchase Nov. 1-Nov. 30
Choices:
Click here pages 170-171
Click here pages 172-173
Holiday Harmony (Mini Catalog)
Apple Cider (Mini Catalog)
Contact me to place your order @ stampwithellen@aol.com
No Limit!
35 Beautiful Choices!
Purchase Nov. 1-Nov. 30
Choices:
Click here pages 170-171
Click here pages 172-173
Holiday Harmony (Mini Catalog)
Apple Cider (Mini Catalog)
Contact me to place your order @ stampwithellen@aol.com
Tuesday, October 30, 2007
Soft Sky Season of Joy
Although hard to see in this photo, this is a beautiful color. I used my favorite new stamp set Season of Joy from the Holiday Mini Catalog. Best feature of this set...it was die-cut! I used Soft Sky Designer Series Paper (DSP) and added a touch of Dazzling Diamonds Glitter applied with a 2-Way Glue Pen.
Monday, October 29, 2007
The Shoes...lol
If anyone remembers my daughter's "shoe dilemma"...what shoes to wear with her red dress? And they couldn't be too high because her date wasn't very tall. Well, she opted to wear the shoes from last year. She loves them anyway. The dance was held in the gym. She said "I only need them to get in the door" Their dance was held in the gym. The school puts down an enormous 'tarp' to protect the floor. No high heels allowed. She and all the other girls were barefoot most of the night. She had a good time and that's all that matters.
Homecoming...
Normally, the Homecoming dance is after the football game. This year it was rained out, twice!! My daughter and her friend (not BF) went to homecoming together. Doesn't she look beautiful! So grown up!! She was nominated for Homecoming Court, but didn't win. She was thrilled to be nominated. So, what's up with this fashion trend? Black shirt, tie and pants?? hmmm????
Hope to get some stamping done, soon!
Saturday, October 27, 2007
Cheating??? Heck no!
When I first started to see scrapbook paper used on cards, as a stamper, I thought it was a little like cheating. Now, I've discovered how polished it can make your cards look. Just like this card. This is the last of the 4 Make & Takes we made at my Upline's meeting. This is a perfect example of how to add a little Wintergreen Designer Series Paper to a card to complete a look. The colors are off in this pic. The piece of grosgrain ribbon that appears brown is actually Always Artichoke, same as the card base. See recipe for actual colors used.
Cardstock: Always Artichoke, Soft Sky, Textured Wild Wasabi, Certainly Celery
Ink: Always Artichoke (note there is only one stamp used on this card, but I LOVE IT!
Stamp Set: Block Party but we only used part of the stamp
Ribbon: Soft Sky Double Stitched Grosgrain, Always Artichoke Grosgrain
Cardstock: Always Artichoke, Soft Sky, Textured Wild Wasabi, Certainly Celery
Ink: Always Artichoke (note there is only one stamp used on this card, but I LOVE IT!
Stamp Set: Block Party but we only used part of the stamp
Ribbon: Soft Sky Double Stitched Grosgrain, Always Artichoke Grosgrain
Thursday, October 25, 2007
Sr. Center cards 10/25/07
The Photo Corner Punch was used to create the tree. My sample has a yellow tree "trunk". Their card has a Kraft CS "trunk"
We used a Clear Envelope to make this pouch. It could hold many things....gift cards, a greeting card, money. We used Tagger's Dozen stamp set for the tags. This set works great with the 2 sizes of Tag Punches. And my very favorite punch is the Scallop Circle Punch.
We used the Carved and Candlelit set, usually used to create Jack-0-lantern cards and scrapbook pages. We stamped the "pumpkin" stamp in Old Olive ink and punched a single flower from the Spring Bouquet Punch from pink CS. Trimmed the flower down, with scissors, because it overpowered the cactus. True Friend set from the Holiday Mini catalog was used for the flower and background. We did Poppin' Pastels technique to color the flowers.
I took a few pictures of the ladies today. It was impossible to get all 13 ladies in one picture...I think a few were camera shy. I'll post those soon.
Sr. Center Class
We had 13 ladies for the Sr. Center Class this time. At this Sr. Center, you are considered a Senior at age 50! Yikes! Everyone was hard at work...although we all have a good time...Table 1 (you know who you are :o) have the most fun. I think almost everyone liked the "Faux Cactus" the most. Thanks Margie, for requesting it.
Build-a-Brad
Finally...the Build-a-brad kits are available! This picture shows off the new brads! Fun and easy to use! We made this card at my Upline's meeting a few weeks ago. Pretty huh? I also love how we punched holes in the scalloped circle. Really kicks it up a notch...lol
I'll update the Sr. Center cards soon...thanks for looking!
Wednesday, October 24, 2007
Peaceful Wishes
I love Peaceful Wishes stamp set! Great for holiday and masculine cards, framed "art" and more. I bought an "ugly" framed print at the $ store. I removed the backing and the "ugly" print then replaced it with the stamped panel. I love the outcome! Looks so much richer IRL. My DS may have done me a favor. He accidentally knocked this off the wall, breaking the glass....now I can add some Dazzling Diamond Glitter!
Tuesday, October 23, 2007
Easy Hostess Gift
One of my new Downline (Hi B!) is planning her 1st Workshop. She was asking what kind of Hostess Gift I give. My Hostesses receive all the projects I make at their WS, a FREE catalog and a special handmade item, I make just for her at her WS. Since I want to make it something really quick and easy...I made this notepad and matching pen. I used Petals & Paisleys Designer Series paper. I just love that stuff! This pack of DSP has both feminine and masculine paper included. And just a little, goes a long way. I love how this particular paper looks like it was pieced...but it wasn't. It's one piece! A short length of Tempting Turquoise grosgrain ribbon dresses it up a little.
Thanks for looking!
Simple and more Glitter!
I created this card using Stampin' Up's Stampin' Write Markers. I love these markers! Only 4 markers were used! I colored directly on the rubber...easy, easy, easy! I used Chocolate Chip for the "string" and then added Real Red for the bow. This would be nearly impossible with an ink pad. The ornaments are Garden Green, Real Red and More Mustard. "Sparkle" greeting was inked with the Real Red marker as well. I used the 2 Way Glue Pen and Dazzling Diamonds Glitter to make those ornaments sparkle. Sorry the photo doesn't show how pretty that looks. White panel was layered on Garden Green and then on a Real Red card base. Sweet and traditional.
Monday, October 22, 2007
I love Simply Scrappin' Kits!
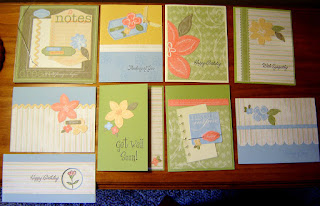
I'm posting these cards, because a friend, living across the miles, wanted to see them. I used less than one 1/2 of a Simply Scrappin Kit to create all the items pictured. There was lots of pieces left over to use for more cards, scrapbook pages and 3D projects. I case'd most of the projects from other stampers, with little touches of my own mixed in. Upcoming classes will be based on the Secret Garden Simply Scrappin kit, the Winter Bright Kit and the Confetti Kit. Great easy projects to complete in a hurry!
A break from Stampin'
I was looking through my pics saved on my laptop. I need to put a lot of them on a disk. I like this one of the children. It was taken last Christmas on a trip to OBX...(the Outer Banks of NC) Notice, it's December and they have sweats on...the weather was lovely. They were headed to the beach, which is right across the street...I have some nice shots of them in the sand, but DD didn't want them on the blog...they had just woken up and wanted to see the dolphin, so no makeup or hair was done that morning. We often see dolphin, playing in the surf. It's a beautiful site!
Sunday, October 21, 2007
Tip of the Week....or so
Have you ever tried to punch regular paper, scrapbook paper or lightweight cardstock, only to have it punch with a lot imperfections? I don't think punches were designed to punch this type of paper. I find using cardstock with punches is the best.
While preparing for my Sr. Center Class, I made a discovery! It may not be new, but it works. When using punches with lightweight paper, etc...hold a piece of scrap paper with the lighter weight paper and put both pieces into the punch at the same time. This "fools" the punch...making it seem like thicker cardstock punches like...lol Works for me...Give it a try!
Fold in the Middle Card by Pennie
This card shows a fold I have never seen before. Pennie, the designer of this card, showed it to me. Boatloads of Love is the perfect set to use for this layout. Pennie used all but one piece of the set for this card. This looks involved but is really easy...especially since Pennie had everything cut and scored for us. Gotta love that! Thanks for the constant inspiration Pennie!
Did you realize you can use the accessory set from Loads of Love set to fill the boats? Don't be limited by using the set alone... I have seen some creative stamps used for items in the boat.
Stamps: Boatloads of Love
Cardstock: Whisper White and Night of Navy
Ink: Basic Black and Real Red
Accessories: Red Pure Color Pencil, Hodgepodge Hardware ribbon buckle, 1/4 in hole punch, sponge and dauber, both oval punches, red and white gingham ribbon...and a Post-it Note to create the mask of the dinghy.
Saturday, October 20, 2007
Pennie's Design...I Love it!
At my Upline's (Pennie) meeting earlier this month, we made this card. Isn't it pretty?! She is so creative. We used the Priceless stamp set for this one. The flowers were stamped in Purely Pomegranate ink on Cardstock Weight Vellum, then punched them out with the 5-Petal flower punch. We used the Crop-a-dile to punch the holes for the eyelets, then used it again to set More Mustard eyelets. I love how we used 2 kinds of ribbon, reg. Grosgrain and Double Stitched Grosgrain. Notice the leaves peeking out from behind the flowers. We stamped the butterfly, using Always Artichoke ink, then cut it into 4 pieces...for LEAVES! How clever!
Z-Fold Season of Joy OSW
Wow, that's a mouthful! Notice the angle at which I took the photo. I think it shows the Z-fold best. Basically, cut the cardstock 4.25 x 11 and fold in half. Then score the front panel at 2 3/4 and fold back. I created a OSW (one sheet wonder) and cut a piece then adhered it to the card base. Cut another panel of Purely Pomegranate for the layer and stamped the tree on a white layer.
Stamps set: Season of Joy...I LOVE this set...not just for Christmas... see it here
Cardstock: Wild Wasabi, Purely Pomegranate, Whisper White
Ink: Wild Wasabi, Purely Pomegranate, River Rock
Accessory: Sponge
Stamps set: Season of Joy...I LOVE this set...not just for Christmas... see it here
Cardstock: Wild Wasabi, Purely Pomegranate, Whisper White
Ink: Wild Wasabi, Purely Pomegranate, River Rock
Accessory: Sponge
Poll Results
Well, I'm glad the majority of you agreed with me about Purely Pomegranate! It is my favorite of the new In Colors. With this being said, I do use and love the other new In Colors. I love having new choices each year. I will miss them when they are gone in June 2008, but until then, I'm using them all the time!
Wanna see them all? Look here it's page 165!
Friday, October 19, 2007
Check out Pennie's tutorial!
My Upline Rocks! You have to check out her tutorial! I love the one hole bow Pennie taught me so long ago. It's easy to make and is not too bulky for mailing. Check out her fabulous blog and this tutorial.
http://www.penniemccallum.typepad.com/
Thanks Pennie!
http://www.penniemccallum.typepad.com/
Thanks Pennie!
Plum for Christmas?
I used the Big on Christmas stamp set for this card. I think these colors and the embossed tree give it a whole different look. To me, this set is "cutesy" but pair with the Brushed Silver cardstock and glitter, it looks more elegant. That's what I love about stamping...the possibilities are endless.
Stamp set: Big on Christmas
Ink: Versamark (my favorite) and Basic Black
Cardstock: Perfect Plum, Pale Plum, Brushed silver
Accessories: Silver Embossing Powder, Two Way Glue Pen to apply Dazzling Diamonds glitter. Pale plum marker, Dimensionals
Thursday, October 18, 2007
last year's Christmas Card
Well, one of them. I was routing through my sample cards and found this. It's one of the versions of last year's Christmas Card. I really dislike making 50 or 100 of one style card. I get bored easily. I think I made about 5 versions using the same colors and stamps. I liked them all when I was done.
Stamps: Snow Flurries, Bold Snowflakes Jumbo Wheel, Warm Words
Ink: Brocade Blue Jumbo cartridge and ink pad
Cardstock: Whisper White, Brocade Blue and Bashful Blue
Accessories: 1 1/4 circle punch, 1 3/8 circle punch, snowflake punch sniff, retired) sponges and a little self-adhesive gem. I'd use a new Rhinestone Brad if I made them for 2007. :o)
Edit! I just looked at my other gallery, I made 9 verions, using all the same supplies! I think I ended up making about 70 or 80 cards!
Maryland Blue Crab
Not to be critical, but I've seen so many cards made using this cute crab from Stampin Up Crab & Co set...most people are coloring the crab RED???!!They are only red AFTER they are steamed. Anyway, I colored this guy with colored pencils, then used Gamsol to blend the colors a bit. I love how the "Whimsy" Jumbo Roller Wheel looks like bubbles under water. I added googlie eyes to give him dimension and character.
Stamps: Crab & Company
Cardstock: Ballet Blue, Whisper White and Basic Black
Ink: Basic Black
Accessories: Googlie eyes, 2-Way Glue Pen, Dazzling Diamonds glitter, colored pencils, black grosgrain ribbon, new Silver Metallic Cord, Sm and Large Tag punches, dimensionals.
Tuesday, October 16, 2007
last Holiday Class card
I call this a "spine" card. I don't know if it has another name. My upline showed me her creation and I loved the idea, especially using this stamp set from Stampin Up. Simple card with no coloring involved. I added a little glitter to the stamped image to give it that "wow" factor. I love the way the "One Hole Bow" adds interest to the "spine".
Stamps: Sleigh Bells Ring (pg.41)
Cardstock: Always Artichoke Very Vanilla and Rose Red
Ink: Always Artichoke
Accessories: 2-way glue pen, Dazzling Diamonds Glitter, Spring Moss(not a typo)grosgrain, gold cord, hole punch
see her card I case'd here, under Oct 13 http://www.penniemccallum.typepad.com/
Holiday Mistletoe
This is my favorite size card. Cut CS to 6 x 6, then fold in half to make a 3 x 6 card. We used Garden Green CS then loaded the Garden Green cartidge to use with Mistletoe roller wheel. After the ink was dry (only a few seconds) we colored the berries on the Mistletoe with the Stampin Up white gel pen. A torn edge layer of Rose Red peeks out from under the torn edge of Garden Green CS. A piece of Hodgepodge Hardware hold a piece of white grosgrain ribbon for a crisp accent. Stamped Season's Greetings in green. This is another card that is easy to make multiples of in a short time.
Holiday Card Class...Baroque Motifs
Yesterday, the ladies made this card at my Holiday class. We used Baroque Motifs stamp set from Stampin Up
Although, this set isn't listed in the Holiday section, it seems suited for a Holiday card, IMO. It's so elegant.
Stamps: Baroque Motifs, Many Merry Messages
Ink: Versamark
Paper: Very Vanilla, Brushed Gold and Brushed Silver
Accessories: Gold EP, Silver Organdy Ribbon, a little self-adhesive gem
Subscribe to:
Posts (Atom)
Be notified by email when I update the Blog: Email Subscriptions powered by FeedBlitz
Gotta have it?
Email your order to me @ stampwithellen@aol.com
Place an order, anytime.
Followers
NeoCounter
Blog Archive
-
▼
2007
(118)
-
▼
October
(45)
- More Season of Joy
- Buy Three Get One FREE
- Soft Sky Season of Joy
- The Shoes...lol
- Homecoming...
- Cheating??? Heck no!
- Sr. Center cards 10/25/07
- Sr. Center Class
- Build-a-Brad
- Peaceful Wishes
- Easy Hostess Gift
- Simple and more Glitter!
- I love Simply Scrappin' Kits!
- A break from Stampin'
- Tip of the Week....or so
- Fold in the Middle Card by Pennie
- Pennie's Design...I Love it!
- Z-Fold Season of Joy OSW
- Poll Results
- Check out Pennie's tutorial!
- Plum for Christmas?
- last year's Christmas Card
- Maryland Blue Crab
- last Holiday Class card
- Holiday Mistletoe
- Holiday Card Class...Baroque Motifs
- Holiday Card Class
- Case'd
- Ta Dah!
- Sr. Center cards
- #4 Faux Jeans
- #3 Sr. Center
- Halloween Cards from Sr. Center
- Sr. Center Cowboy
- Another hint...
- A little teaser
- Isn't this cute!
- Holiday Glitz Card Kit samples
- Tip of the Day...colored staples
- Three is plenty
- Pink, Black and White
- Read deets (details) below
- Frosty...not!
- I love punches!
- You have to see this!
-
▼
October
(45)